Last Updated on: 18th March 2021, 09:59 pm
Last Updated on by Viliam
Article from my friend, Mack Dorler from Bern, Switzerland.
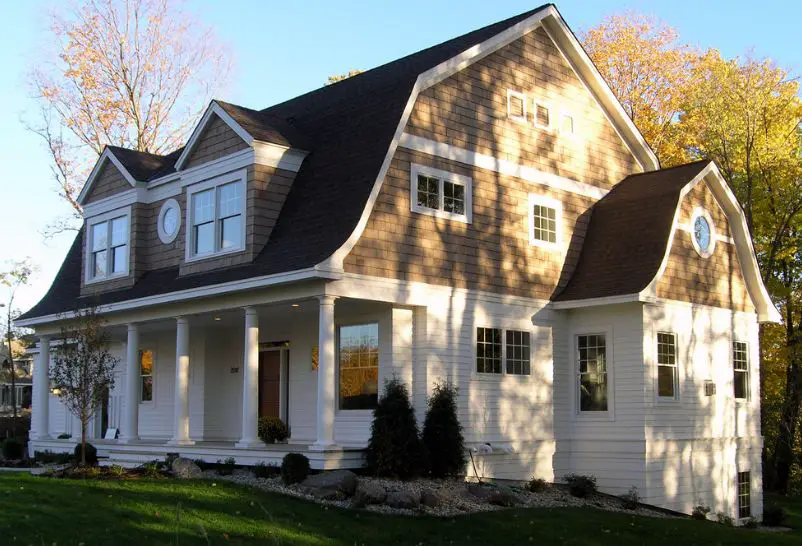
The architectural gambrel roof design is very popular both in Europe and the USA, as it maximizes the space in the building. The reason behind it is because the roof bends at two angles as opposed to the traditional one angled-roof design, thereby giving you more square footage to utilize. It’s no wonder why most barns adapt the gambrel roof design. Maybe you are currently considering building or renovate your house or barn. Why not use the gambrel roof design? Check out the steps below and build your own gambrel roof house.
Planning and Instructions
– The first thing you need to do is to determine how many trusses your gambrel roof needs with reference to the building size that is to be constructed. Measure 16 inches on either side of the center before you place each truss and do it subsequently placing them 16-inch apart.
– After that determine the precise height at which you would like your gambrel roof to be. Normally the width of the building also determines the height of the roof, so if you have a building width of 36 feet your roof will reach a height of 10.4 feet, while a building width of 16 feet will have a 5.2 feet ceiling (all measurements should be taken from inside the structure. In the end, the choice is still your own. The normal gambrel roof angles are 30 degrees at the top and 60 degrees on the lower section.
You can also make the roof trusses yourself or purchase them pre-assembled at a local hardware store and just have them delivered where you will construct the house.
Layout
– Buy the appropriate lumber for the roof trusses (preferably pre-cut to the exact dimensions needed). You can start with a 2 x 6 lumber for the trusses as they have a solid cross-section to support the weight of the gambrel roof and you can easily get them a lumber yard.
– Work on a leveled ground plane (if need be, measure it with a leveling stick) as you begin to layout the trusses for your gambrel roof. Use stakes in order to hold your gambrel roof angles into place and to preserve its measurements when you’ll be raising it to the ceiling.
– Construct a square figure using 4 pieces of lumber (this will be one side of the gambrel roof) and make sure that it is proportionate to half of the size of the ceiling, mark each point with charcoal chalk where it needs to be cut and mark the angles at which it needs to be installed.
– Cut them at the designated points and use them as a guide from which you will fashion the remaining trusses.
– Afterwards trace the angles of the trusses onto cardboard, then utilize the cardboards as a pattern to make bracket supports (use ½-inch plywood for your brackets). The traces left on the cardboards will show you two distinct shapes; one shape will look like a “dogleg” angle while the other shape looks like a perfect triangle.
Assembling the Trusses
– Put the trusses together to form the gambrel roof while they’re still on the ground. And to keep the assembled pieces into place don’t forget to use stakes driven to the ground until your gambrel roof angles are completely secured.
– Now using 8 penny nails, attach the braces on each of the corresponding trusses joints. In case you feel the bracket supports are not enough to reinforce the whole truss design, you can use metal straps in order to tighten them.
– Using a 2 x 6-inch board complete the truss by placing the board in between the bracket supports (doglegs). This will serve as a girder and lock the whole assembly into place.
Raising the Trusses
– Slowly lift the trusses into position, but make sure that you use a plumb-bob to determine that they are parallel to the horizon before you nail them to the beams.
– You’ll also need to place a temporary brace on either side of each truss while building your gambrel roof. The purpose of this brace is to maintain the straightness of the trusses. And when you’re ready to add the plywood sheathing to create the roof, you can just remove it.
– The normal plywood sheaths’ thickness is around 3/4ths of an inch; however, if you live in colder regions where heavy snows stick to the rooftops, then you may want to consider to increase this thickness to 1 and ½ to 2 inches in order to support that extra weight load of snow.
– Remember to apply waterproof materials over the plywood sheets to make sure that your roof is weather resistant.
The End Walls
– To make your end walls remember to cut studs for them. In order for the trusses and the studs to fit together, you will need to cut angles in the studs and notches into the trusses. This needs to be done so that they will fit the gambrel roof angles perfectly.
– Afterwards, you can install window frames.
– Finish the end walls by enclosing them with plywood, then use shingle or siding for the outer furnish.
